I was waiting to do any big bulletin boards until I found out where I was teaching. Usually I am a "mobile teacher", teaching in 3 different rooms throughout the day. Not this year! I've got all of my classes in the same room. Woo hoo! No need for me to put everything on Bristol board or tri-fold boards and haul them from class to class.
Last year I used "tweet sheets" as a exit slip and they were so much fun! Make sure to mix up the prompts... but more on that in a future post. Today I want to show you why I love my Silhouette Cameo and how easy it is to cut out any shape.
If you look on the Silhouette Studio Store there isn't anything that resembles the cute bird from the twitter logo. I wanted to use that as part of this bulletin board I'm making, but school starts next week and I'll already have so much laminating to cut out!
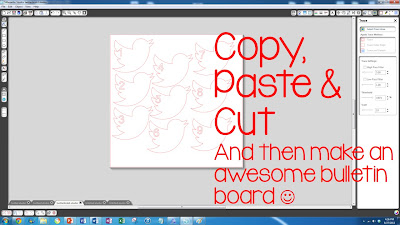
Here are the few steps you'll need to do in order to cut out the cute shapes you can't find in the store for your bulletin boards:
Now this is what I've got:
 |
| That won't be the background, it's just the inside of a notebook :) |
My Cameo is really paying off this week! Do you have one too? How do you use it for your classroom? Let me know in the comments below :)


thank you!
ReplyDeleteThank you! Can't wait to try it!
ReplyDeleteQuestion about your cameo: Do you find that you use the 12" or would the portrait (at 8" - letter size) be sufficient? I really want one, but have to figure out if I'll *really* use it or if I just want a new toy :) I can't think of anything I'd like to cut larger than 8" right now.
ReplyDeleteWhat I Have Learned
Hi Jessica,
DeleteI use letter size cardstock quite a bit with my cameo, but I would say that is mostly because the paper is cheaper and I can buy packs vs. individual sheets. I really like making things with the 12" paper and often find I waste less with the 12" paper. If your budget allows, I'd suggest going with the cameo so that your creative projects are never limited by the size. I hope this helps with your decision!
Michelle :)
Many thanks Michelle
ReplyDeleteFor others that might find the same problem as me, after you've turned the image yellow you need to the click the "trace and detach" button on the right in order to use the image.
ReplyDeleteAHHHHHHHH!!!!! You are my new hero!!!!! I've been trying forever to figure this out! THANK YOU!!!
ReplyDeleteI don't have a cameo I have the Cricut and Expression machine
ReplyDeleteThanks for the tutorial! I was wondering if there was a way to save the shape, once your trace and detach it, so that you can just pull up the cut (without repeating these steps) for future use.
ReplyDeleteOh! I realized if you hit 'Save As' you have the option to 'Save to Library.' Very handy! Thanks again for the tutorial!
ReplyDeleteI am new to using the silhouette. I am having a hard time getting the machine to cut the image once I have followed the above steps. Including the trace and attach. What could I be doing wrong?
ReplyDeleteSometimes I find that I have to adjust the threshold, the low pass or high pass filters. It really depends on the image that you are trying to trace and the quality of that image. Play with those: threshold, low pass and high pass filters and sometimes the scale and hopefully it will work out for you! :)
DeleteI love my Cameo. I use it to personalize Cheer Bows for my granddaughter. I've found that the Trace feature followed immediately with the Modify/Crop feature gives me an image free of the background, and all the little open spaces. I haven't used it on paper yet. I cut heat transfer viny and heat transfer glitter.
ReplyDeleteI am trying to follow your steps for the twitter logo but when I try to drag it onto the design page from my desktop, it gives me an error message that it does not support this image. Suggestions?
ReplyDeleteHi Mary, I have found, for whatever reason, some types of files just don't work. I stil to searching for PNG files and have the best luck with them. Another option is to save the image and then open it within the silhouette studio software instead of dragging it. Good luck!
Delete